Tuesday, January 15, 2019

Angular 7 Tutorial - Learn Angular 7 by Example

Angular 7 Tutorial - Learn Angular 7 by Example


Ever since the release of Angular 2, I have created a full course for each new iteration. Today is no different, as Angular 7 just released!
With this beginner's crash course, I make the assumption that you have never worked with Angular before. Therefore, this tutorial is perfectly suited towards a beginner with no prior Angular experience. The only thing you should be familiar with is HTML, CSS and JavaScript.
In this course, you're going to discover just how powerful Angular 7 is when it comes to creating frontend web apps. Let's get started!

Installation

You're first going to need to install the Angular CLI (Command Line Interface) tool, which helps you start new Angular 7 projects as well as assist you during development. In order to install the Angular CLI, you will need Nodejs. Make sure you install this with the default options and reload your command line or console after doing so.
In your command line, type:
> npm install -g @angular/cli
Once complete, you can now access the CLI by simply starting any commands with ng.
Hop into whichever folder you want to store your projects, and run the following command to install a new Angular 7 project:
> ng new ng7-pre
It's going to present you with a couple questions before beginning:
? Would you like to add Angular routing? Yes
? Which stylesheet format would you like to use? SCSS [ http://sass-lang.com ]
It will take a minute or two and once completed, you can now hop into the new project folder by typing:
> cd ng7
Open up this project in your preferred code editor (I use Visual Studio Code, and you can launch it automatically by typing code . in the current folder), and then run this command to run a development server using the Angular CLI:
> ng serve -o
-o is for open, this flag will open your default browser at http://localhost:4200. Tip: You can type ng to get a list of all available commands, and ng [command] --help to discover all their flags.
Awesome! If all went smooth, you should be presented with the standard landing page template for your new Angular 7 project:

Angular 7 Components

The most basic building block of your Angular 7 application (and this is a concept that's not new) is the component. A component consists of three primary elements:
  • The HTML template
  • The logic
  • The styling (CSS, Sass, Stylus, etc..)
When we use the Angular CLI to start a new project, it generates a single component, which is found in /src/app/:
/app.component.html
/app.component.scss
/app.component.ts
While we have three files here that represent the three elements above, the .ts (TypeScript) is the heart of the component. Let's take a look at that file:
import { Component } from '@angular/core';

@Component({
selector: 'app-root',
templateUrl: './app.component.html',
styleUrls: ['./app.component.scss']
})
export class AppComponent {
title = 'ng7-pre';
}
Here, because this is a component, we're importing Component from the @angular/core library, and then it defines what's called a @Component decorator, which provides configuration options for that particular component.
As you can see, it's referencing the location of the HTML template file and the CSS file with the templateUrl property and the styleUrls property.
The logic of the component resides in the class at the bottom. As you can see, the CLI starter template simply defines a single property called title.
Let's use the Angular CLI to create our own components that we'll need going forward. In the console, issue the following commands:
> ng generate component nav
// output

> ng g c about
// output

> ng g c contact
// output

> ng g c home
// output
Notice we first use the full syntax to generate a component, and then we use a shorthand syntax, which makes life a little bit easier. The commands do the same thing: generate components.
When we generate components this way, it will create a new folder in the /src/ folder based on the name we gave it, along with the respective template, CSS, .ts and .spec (for testing) files.

Angular 7 Templating

You may have noticed that one of the components we generated was called nav. Let's implement a header bar with a navigation in our app!
The first step is to visit the app.component.html file and specify the following contents:
<app-nav></app-nav>

<section>
<router-outlet></router-outlet>
</section>
So, we've removed a bunch of templating and placed in <app-nav></app-nav>, what does this do and where does it come from?
Well, if you visit /src/app/nav/nav.component.ts you will see that in the component decorator, there's a selector property bound to the value of app-nav. When you reference the selector of a given component in the form of a custom HTML element, it will nest that component inside of the component it's that's referencing it.
If you save the file you just updated, you will see in the browser we have a simple, nav works! And that's because the nav.component.html file consists of a simple paragraph stating as much.
At this point, let's specify the following HTML to create a simple navigation:
<header>
<div class="container">
<a routerLink="/" class="logo">apptitle</a>
<nav>
<ul>
<li><a routerLink="/">Home</a></li>
<li><a routerLink="/about">About</a></li>
<li><a routerLink="/contact">Contact us</a></li>
</ul>
</nav>
</div>
</header>
The only thing that might look a little strange is routerLink. This is an Angular 7 specific attribute that allows you to direct the browser to different routed components. The standard href element will not work.
While we're here on the subject of templating, what if we wanted to display properties that are coming from our component? We use what's called interpolation.
Make the following adjustment to our template:
<!-- From: -->
<a routerLink="/">myapp</a>

<!-- To: -->
<a routerLink="/">{{ appTitle }}</a>

Interpolation is executed by wrapping the name of a property that's defined in the component between {{ }}.
Let's define that property in nav.component.ts:
export class NavComponent implements OnInit {

appTitle: string = 'myapp';
// OR (either will work)
appTitle = 'myapp';

constructor() { }

ngOnInit() {
}

}
You can use the TypeScript way of defining properties or standard JavaScript. Save the file and you will see myapp is back in the template.
There's a lot more to templating, but we will touch on those topics as we continue. For now, let's apply style to our header.
First, let's visit the global stylesheet by opening /src/styles.scss and define the following rulesets:
@import url('https://fonts.googleapis.com/css?family=Montserrat:400,700');

body, html {
height: 100%;
margin: 0 auto;
}

body {
font-family: 'Montserrat';
font-size: 18px;
}

a {
text-decoration: none;
}

.container {
width: 80%;
margin: 0 auto;
padding: 1.3em;
display: grid;
grid-template-columns: 30% auto;

a
{
color: white;
}
}

section {
width: 80%;
margin: 0 auto;
padding: 2em;
}
Visit nav/component.scss and paste the following contents:
header {
background: #7700FF;

.logo
{
font-weight: bold;
}

nav {
justify-self: right;

ul
{
list-style-type: none;
margin: 0; padding: 0;

li
{
float: left;

a
{
padding: 1.5em;
text-transform: uppercase;
font-size: .8em;

&:hover
{
background: #8E2BFF;
}
}
}
}
}
}
If you save and refresh, this should be the result in the browser:

Awesome!

Angular 7 Routing

Now that we have a navigation, let's make our little app actually navigation between our components as needed.
Open up /src/app/app-routing.module.ts and specify the following contents:
// Other imports removed for brevity

import { HomeComponent } from './home/home.component';
import { AboutComponent } from './about/about.component';
import { ContactComponent } from './contact/contact.component';

const routes: Routes = [
{ path: '', component: HomeComponent },
{ path: 'about', component: AboutComponent },
{ path: 'contact', component: ContactComponent },
];

// Other code removed for brevity
As we can see here, we're defining importing our components and defining an object for each route inside of the routes constant. These route objects also accept other properties, which allow you to define URL parameters, but because our app is simple, we won't be doing any of that.
Save this file and try clicking on the links above. You will see that each of the respective component's HTML templating shows up in the <router-outlet></router-outlet> defined in app.component.html.
This is what the result should look like in the browser at this point:

You now know enough about Angular 7 to create a very simple website with routing!  But let's learn more than that.

Angular 7 Event Binding

In the next several sections, we're going to use our /src/app/home component as a playground of sorts to learn features specific to Angular 7.
One of the most used forms of event binding is the click event. You often need to make your app respond when a user clicks something, so let's do that!
Visit the /src/app/home/home.component.html template file and specify the following:
<h1>Home</h1>

<button (click)="firstClick()">Click me</button>
You define an event binding by wrapping the event between (), and calling a method. You define the method in the home.component.ts file as such:
export class HomeComponent implements OnInit {

constructor() { }

ngOnInit() {
}

firstClick() {
console.log('clicked');
}

}
Save it, get out the browser console (CTRL+SHIFT+i) and click on the button. The output should show clicked. Great!
You can experiment with the other event types by replacing (click) with the names below:
(focus)="myMethod()"
(blur)="myMethod()"
(submit)="myMethod()"
(scroll)="myMethod()"

(cut)="myMethod()"
(copy)="myMethod()"
(paste)="myMethod()"

(keydown)="myMethod()"
(keypress)="myMethod()"
(keyup)="myMethod()"

(mouseenter)="myMethod()"
(mousedown)="myMethod()"
(mouseup)="myMethod()"

(click)="myMethod()"
(dblclick)="myMethod()"

(drag)="myMethod()"
(dragover)="myMethod()"
(drop)="myMethod()"

Angular 7 Class & Style Binding

Sometimes you may need to change the appearance of your UI from your component logic. There are two ways to do this, through class and style binding.
There are a lot of different methods you can use to control class binding, so we won't cover them all. But I will cover some of the most common use cases.
Let's say that you want to control whether or not a CSS class is applied to a given element. Update the h1 element in home.component.html to the following:
<h1 [class.gray]="h1Style">Home</h1>
Here, we're saying that the CSS class of .gray should only be attached to the h1 element if the property h1Style results to true. Let's define that in the home.component.ts file:
  h1Style: boolean = false;

constructor() { }

ngOnInit() {
}

firstClick() {
this.h1Style = true;
}
Let's also define the .gray class in this component's scss file:
.gray {
color: gray;
}
Save it, and you can now click on the click me button to change the color of the Home title.
What if you wanted to control multiple classes on a given element? You can use ngClass. Modify the home component's template file to the following:
<h1 [ngClass]="{
'gray': h1Style,
'large': !h1Style
}"
>
Home</h1>
Then, add the large ruleset to the .scss file:
.large {
font-size: 4em;
}
Now give it a shot in the browser. Home will appear large, but shrink down to the regular size when you click the button. Great!
You can also control appearance by changing the styles directly from within the template. Modify the template as such:
<h1 [style.color]="h1Style ? 'gray': 'black'">Home</h1>
Refresh and give this a shot by clicking the button.
Like ngClass() there's also an ngStyle() that works the same way:
<h1 [ngStyle]="{
'color': h1Style ? 'gray' : 'black',
'font-size': !h1Style ? '1em' : '4em'
}"
>
Home</h1>
Give this a go! Awesome!

Angular 7 Services

Services in Angular 7 allow you to define code that's accessible and reusable throughout multiple components. A common use case for services is when you need to communicate with a backend of some sort to send and receive data.
> ng generate service data
Open up the new service file /src/app/data.service.ts and let's create the following method:
// Other code removed for brevity

export class DataService {

constructor() { }

firstClick() {
return console.log('clicked');
}
}
To use this in a component, visit /src/app/home/home.component.ts and update the code to the following:
import { Component, OnInit } from '@angular/core';
import { DataService } from '../data.service';

@Component({
selector: 'app-home',
templateUrl: './home.component.html',
styleUrls: ['./home.component.scss']
})
export class HomeComponent implements OnInit {

constructor(private data: DataService) { }

ngOnInit() {
}

firstClick() {
this.data.firstClick();
}

}
There are 3 things happening here:
  • We're first importing the DataService at the top.
  • We're creating an instance of it through dependency injection within the constructor() function.
  • Then we call the method with this.data.firstClick() when the user clicks on the button.
If you try this, you will see that it works as clicked will be printed to the console. Awesome! This means that you now know how to create methods that are accessible from any component in your Angular 7 app.

Angular 7 HTTP Client

Angular comes with its own HTTP library that we will use to communicate with a fake API to grab some data and display it on our home template. This will take place within the data.service file that we generated with the CLI.
In order to gain access to the HTTP client library, we have to visit the /src/app/app.module.ts file and make a couple changes. Up until this point, we haven't touched this file, but the CLI has been modifying it based on the generate commands we've issued to it.
Add the following to the imports section at the top:
// Other imports
import { HttpClientModule } from '@angular/common/http';
Next, add it to the imports array:
  imports: [
BrowserModule,
AppRoutingModule,
HttpClientModule, // <-- Right here
],
Now we can use it in our /src/app/data.service.ts file:
import { Injectable } from '@angular/core';
import { HttpClient } from '@angular/common/http'; // Import it up here

@Injectable({
providedIn: 'root'
})
export class DataService {

constructor(private http: HttpClient) { }

getUsers() {
return this.http.get('https://reqres.in/api/users')
}
}
reqres.in is a free public API that we can use to grab data.
Open up our home.component.ts file and modify the following:
export class HomeComponent implements OnInit {

users: Object;

constructor(private data: DataService) { }

ngOnInit() {
this.data.getUsers().subscribe(data => {
this.users = data
console.log(this.users);
}
);
}

}
The first thing you might notice is that we're placing the code inside of the ngOnInit() function, which is a lifecycle hook for Angular. Any code placed in here will run when the component is loaded.
We're defining a users property, and then we're calling the .getUsers() method and subscribing to it. Once the data is received, we're binding it to our users object and also console.logging it.
Give it a try in the browser and you will see the console shows an object that's returned. Let's display it on our home template!
Open up home.component.html and specify the following:
<h1>Users</h1>

<ul *ngIf="users">
<li *ngFor="let user of users.data">
<img [src]="user.avatar">
<p>{{ user.first_name }} {{ user.last_name }}</p>
</li>
</ul>
Great! Let's specify some CSS to make this look better in home.component.scss:
ul {
list-style-type: none;
margin: 0;padding: 0;

li
{
background: rgb(238, 238, 238);
padding: 2em;
border-radius: 4px;
margin-bottom: 7px;
display: grid;
grid-template-columns: 60px auto;

p
{
font-weight: bold;
margin-left: 20px;
}

img {
border-radius: 50%;
width: 100%;
}
}
}
View the result in the browser:

Awesome!

Angular 7 Forms

If you recall, we generated a component called contact. Let's create a contact form so that you can learn how to use forms in Angular 7.
Angular 7 provides you with two different approaches to dealing with forms: template driven and reactive forms. I'm not going to go into the differences between these two approaches, but reactive forms generally provide you with more control andform validation can be unit tested as opposed to template driven forms.
To get started, we have to visit the app.module.ts file and import the Reactive Forms Module:
// other imports
import { ReactiveFormsModule } from '@angular/forms';

// other code
imports: [
BrowserModule,
AppRoutingModule,
HttpClientModule,
ReactiveFormsModule // <- Add here
],
 Next, visit the contact.component.ts file and specify the following
import { Component, OnInit } from '@angular/core';
import { FormBuilder, FormGroup, Validators } from '@angular/forms';

@Component({
selector: 'app-contact',
templateUrl: './contact.component.html',
styleUrls: ['./contact.component.scss']
})
export class ContactComponent implements OnInit {

messageForm: FormGroup;
submitted = false;
success = false;

constructor(private formBuilder: FormBuilder) { }

ngOnInit() {
this.messageForm = this.formBuilder.group({
name: ['', Validators.required],
message: ['', Validators.required]
});
}

onSubmit() {
this.submitted = true;

if (this.messageForm.invalid) {
return;
}

this.success = true;
}

}
First, we're importing FormBuilder, FormGroup, Validators from @angular/forms.
Then we're setting a few boolean properties that will help us determine when the form has been submitted and if it validation is successful.
Then we're creating an instance of the formBuilder in the constructor. We then use this form building to construct our form properties in the ngOnInit() lifecycle hook.
We have two properties, name and message.
Then we created an onSubmit() method that will be called when the user submits the form. This is typically where you would call upon a method in the service to communicate with a mail service of sorts.
Next, visit contact.component.html:
<h1>Contact us</h1>

<form [formGroup]="messageForm" (ngSubmit)="onSubmit()">

<h5 *ngIf="success">Your form is valid!</h5>

<label>
Name:
<input type="text" formControlName="name">
<div *ngIf="submitted && messageForm.controls.name.errors" class="error">
<div *ngIf="messageForm.controls.name.errors.required">Your name is required</div>
</div>
</label>

<label>
Message:
<textarea formControlName="message"></textarea>
<div *ngIf="submitted && messageForm.controls.message.errors" class="error">
<div *ngIf="messageForm.controls.message.errors.required">A message is required</div>
</div>
</label>

<input type="submit" value="Send message" class="cta">

</form>

<div *ngIf="submitted" class="results">
<strong>Name:</strong>
<span>{{ messageForm.controls.name.value }}</span>

<strong>Message:</strong>
<span>{{ messageForm.controls.message.value }}</span>
</div>

Baked in here is a full form with validation. It also prints out the form values beneath it when the form has been submitted.
Let's update the css for the component to make it look decent:
label {
display: block;

input, textarea
{
display: block;
width: 50%;
margin-bottom: 20px;
padding: 1em;
}

.error {
margin-top: -20px;
background: yellow;
padding: .5em;
display: inline-block;
font-size: .9em;
margin-bottom: 20px;
}
}

.cta {
background: #7700FF;
border: none;
color: white;

text-transform: uppercase;
border-radius: 4px;
padding: 1em;
cursor: pointer;
font-family: 'Montserrat';
}

.results {
margin-top: 50px;

strong
{
display: block;
}
span {
margin-bottom: 20px;
display: block;
}
}
Save it, and the result in the browser should look like this!

Awesome!

Conclusion

As you can see, Angular 7 is quite powerful but we've only just scratched the surface.


Angular 4 - Module

Angular 4 - Module

Module in Angular refers to a place where you can group the components, directives, pipes, and services, which are related to the application.
In case you are developing a website, the header, footer, left, center and the right section become part of a module.
To define module, we can use the NgModule. When you create a new project using the Angular –cli command, the ngmodule is created in the app.module.ts file by default and it looks as follows −
import { BrowserModule } from '@angular/platform-browser';
import { NgModule } from '@angular/core';
import { AppComponent } from './app.component';

@NgModule({
declarations
: [
AppComponent
],
imports
: [
BrowserModule
],
providers
: [],
bootstrap
: [AppComponent]
})

export class AppModule { }
The NgModule needs to be imported as follows −
import { NgModule } from '@angular/core';
The structure for the ngmodule is as shown below −
@NgModule({
declarations
: [
AppComponent
],
imports
: [
BrowserModule
],
providers
: [],
bootstrap
: [AppComponent]
})
It starts with @NgModule and contains an object which has declarations, import s, providers and bootstrap.

Declaration

It is an array of components created. If any new component gets created, it will be imported first and the reference will be included in declarations as shown below −
declarations: [
AppComponent,
NewCmpComponent
]

Import

It is an array of modules required to be used in the application. It can also be used by the components in the Declaration array. For example, right now in the @NgModule we see the Browser Module imported. In case your application needs forms, you can include the module as follows −
import { FormsModule } from '@angular/forms';
The import in the @NgModule will be like the following −
imports: [
BrowserModule,
FormsModule
]

Providers

This will include the services created.

Bootstrap

This includes the main app component for starting the execution.


Angular 4 - Components

Angular 4 - Components

 Angular 4 is done in the components. Components are basically classes that interact with the .html file of the component, which gets displayed on the browser. We have seen the file structure in one of our previous chapters. The file structure has the app component and it consists of the following files −

  • app.component.css
  • app.component.html
  • app.component.spec.ts
  • app.component.ts
  • app.module.ts
The above files were created by default when we created new project using the angular-cli command.
If you open up the app.module.ts file, it has some libraries which are imported and also a declarative which is assigned the appcomponent as follows −
import { BrowserModule } from '@angular/platform-browser';
import { NgModule } from '@angular/core';
import { AppComponent } from './app.component';

@NgModule({
declarations: [
AppComponent
],
imports: [
BrowserModule
],
providers: [],
bootstrap: [AppComponent]
})

export class AppModule { }
The declarations include the AppComponent variable, which we have already imported. This becomes the parent component.
Now, angular-cli has a command to create your own component. However, the app component which is created by default will always remain the parent and the next components created will form the child components.
Let us now run the command to create the component.
ng g component new-cmp
When you run the above command in the command line, you will receive the following output −
C:\projectA4\Angular 4-app>ng g component new-cmp
installing component
create src\app\new-cmp\new-cmp.component.css
create src\app\new-cmp\new-cmp.component.html
create src\app\new-cmp\new-cmp.component.spec.ts
create src\app\new-cmp\new-cmp.component.ts
update src\app\app.module.ts
Now, if we go and check the file structure, we will get the new-cmp new folder created under the src/app folder.
The following files are created in the new-cmp folder −
  • new-cmp.component.css − css file for the new component is created.
  • new-cmp.component.html − html file is created.
  • new-cmp.component.spec.ts − this can be used for unit testing.
  • new-cmp.component.ts − here, we can define the module, properties, etc.
Changes are added to the app.module.ts file as follows −
import { BrowserModule } from '@angular/platform-browser';
import { NgModule } from '@angular/core';
import { AppComponent } from './app.component';
import { NewCmpComponent } from './new-cmp/new-cmp.component';
// includes the new-cmp component we created

@NgModule({
declarations
: [
AppComponent,
NewCmpComponent // here it is added in declarations and will behave as a child component
],
imports
: [
BrowserModule
],
providers
: [],
bootstrap
: [AppComponent] //for bootstrap the AppComponent the main app component is given.
})

export class AppModule { }
The new-cmp.component.ts file is generated as follows −
import { Component, OnInit } from '@angular/core'; // here angular/core is imported .

@Component({
// this is a declarator which starts with @ sign. The component word marked in bold needs to be the same.
selector
: 'app-new-cmp', //
templateUrl
: './new-cmp.component.html',
// reference to the html file created in the new component.
styleUrls
: ['./new-cmp.component.css'] // reference to the style file.
})

export class NewCmpComponent implements OnInit {
constructor
() { }
ngOnInit
() {}
}
If you see the above new-cmp.component.ts file, it creates a new class called NewCmpComponent, which implements OnInit.In, which has a constructor and a method called ngOnInit(). ngOnInit is called by default when the class is executed.
Let us check how the flow works. Now, the app component, which is created by default becomes the parent component. Any component added later becomes the child component.
When we hit the url in the http://localhost:4200/ browser, it first executes the index.html file which is shown below −
<!doctype html>
<html lang = "en">
<head>
<meta charset = "utf-8">
<title>Angular 4App</title>
<base href = "/">
<meta name="viewport" content="width = device-width, initial-scale = 1">
<link rel = "icon" type = "image/x-icon" href = "favicon.ico">
</head>

<body>
<app-root></app-root>
</body>
</html>
The above is the normal html file and we do not see anything that is printed in the browser. Take a look at the tag in the body section.
<app-root></app-root>
This is the root tag created by the Angular by default. This tag has the reference in the main.ts file.
import { enableProdMode } from '@angular/core';
import { platformBrowserDynamic } from '@angular/platform-browser-dynamic';
import { AppModule } from './app/app.module';
import { environment } from './environments/environment';

if (environment.production) {
enableProdMode
();
}

platformBrowserDynamic
().bootstrapModule(AppModule);
AppModule is imported from the app of the main parent module, and the same is given to the bootstrap Module, which makes the appmodule load.
Let us now see the app.module.ts file −
import { BrowserModule } from '@angular/platform-browser';
import { NgModule } from '@angular/core';
import { AppComponent } from './app.component';
import { NewCmpComponent } from './new-cmp/new-cmp.component';

@NgModule({
declarations
: [
AppComponent,
NewCmpComponent
],
imports
: [
BrowserModule
],
providers
: [],
bootstrap
: [AppComponent]
})

export class AppModule { }
Here, the AppComponent is the name given, i.e., the variable to store the reference of the app. Component.ts and the same is given to the bootstrap. Let us now see the app.component.ts file.
import { Component } from '@angular/core';

@Component({
selector
: 'app-root',
templateUrl
: './app.component.html',
styleUrls
: ['./app.component.css']
})

export class AppComponent {
title
= 'Angular 4 Project!';
}
Angular core is imported and referred as the Component and the same is used in the Declarator as −
@Component({
selector: 'app-root',
templateUrl: './app.component.html',
styleUrls: ['./app.component.css']
})
In the declarator reference to the selector, templateUrl and styleUrl are given. The selector here is nothing but the tag which is placed in the index.html file that we saw above.
The class AppComponent has a variable called title, which is displayed in the browser.
The @Component uses the templateUrl called app.component.html which is as follows −
<!--The content below is only a placeholder and can be replaced.-->
<div style="text-align:center">
<h1>
Welcome to {{title}}.
</h1>
</div>
It has just the html code and the variable title in curly brackets. It gets replaced with the value, which is present in the app.component.ts file. This is called binding. We will discuss the concept of binding in a subsequent chapter.
Now that we have created a new component called new-cmp. The same gets included in the app.module.ts file, when the command is run for creating a new component.
app.module.ts has a reference to the new component created.
Let us now check the new files created in new-cmp.

new-cmp.component.ts

import { Component, OnInit } from '@angular/core';
@Component({
selector: 'app-new-cmp',
templateUrl: './new-cmp.component.html',
styleUrls: ['./new-cmp.component.css']
})

export class NewCmpComponent implements OnInit {
constructor() { }
ngOnInit() {}
}
Here, we have to import the core too. The reference of the component is used in the declarator.
The declarator has the selector called app-new-cmp and the templateUrl and styleUrl.
The .html called new-cmp.component.html is as follows −
<p>
new-cmp works!
</p>
As seen above, we have the html code, i.e., the p tag. The style file is empty as we do not need any styling at present. But when we run the project, we do not see anything related to the new component getting displayed in the browser. Let us now add something and the same can be seen in the browser later.
The selector, i.e., app-new-cmp needs to be added in the app.component .html file as follows −
<!--The content below is only a placeholder and can be replaced.-->
<div style="text-align:center">
<h1>
Welcome to {{title}}.
</h1>
</div>

<app-new-cmp></app-new-cmp>
When the <app-new-cmp></app-new-cmp> tag is added, all that is present in the .html file of the new component created will get displayed on the browser along with the parent component data.
Let us see the new component .html file and the new-cmp.component.ts file.

new-cmp.component.ts

import { Component, OnInit } from '@angular/core';

@Component({
selector: 'app-new-cmp',
templateUrl: './new-cmp.component.html',
styleUrls: ['./new-cmp.component.css']
})

export class NewCmpComponent implements OnInit {
newcomponent = "Entered in new component created";
constructor() {}
ngOnInit() { }
}
In the class, we have added one variable called new component and the value is “Entered in new component created”.
The above variable is bound in the .new-cmp.component.html file as follows −
<p>
{{newcomponent}}
</p>

<p>
new-cmp works!
</p>
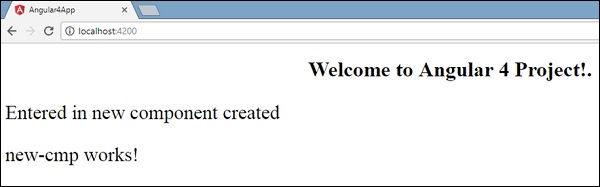
Now since we have included the <app-new-cmp></app-new-cmp> selector in the app. component .html which is the .html of the parent component, the content present in the new component .html file (new-cmp.component.html) gets displayed on the browser as follows −
Using Selectors Browser OutputSimilarly, we can create components and link the same using the selector in the app.component.html file as per our requirements.
 

Angular 4 - Project Setup

Angular 4 - Project Setup


Angular 2 is based on the components structure. Angular 4 works on the same structure as Angular2 but is faster when compared to Angular2.

Angular4 uses TypeScript 2.2 version whereas Angular 2 uses TypeScript version 1.8. This brings a lot of difference in the performance.
To install Angular 4, the Angular team came up with Angular CLI which eases the installation. You need to run through a few commands to install Angular 4.
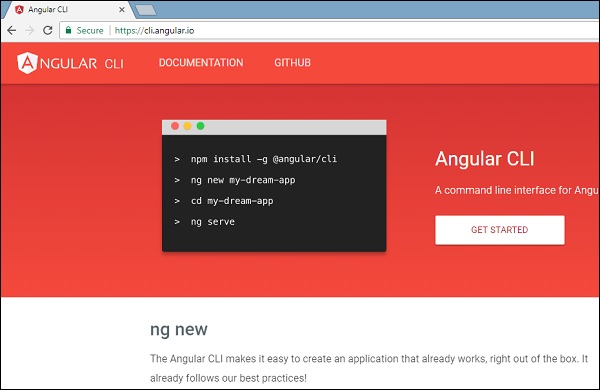
Go to this site https://cli.angular.io to install Angular CLI.
Angular CLITo get started with the installation, we first need to make sure we have nodejs and npm installed with the latest version. The npm package gets installed along with nodejs.
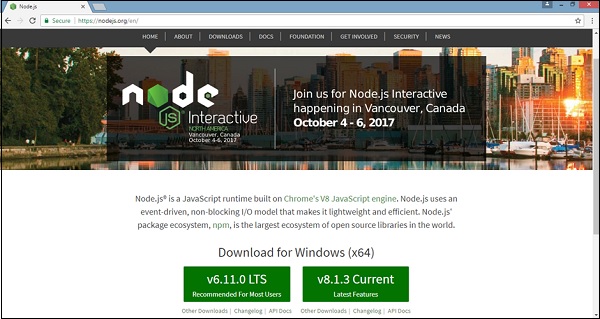
Go to the nodejs site https://nodejs.org/en/.
Download NodeJsThe latest version of Nodejs v6.11.0 is recommended for users. Users who already have nodejs greater than 4 can skip the above process. Once nodejs is installed, you can check the version of node in the command line using the command, node –v, as shown below −
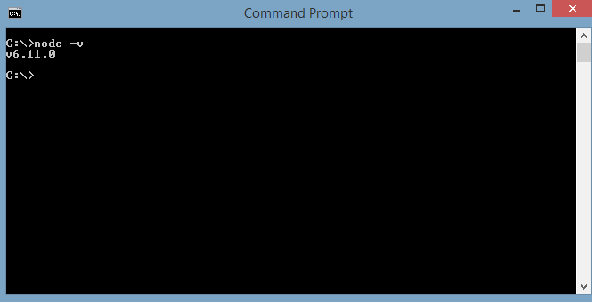
Command Prompt Shows v6.11.0The command prompt shows v6.11.0. Once nodejs is installed, npm will also get installed along with it.
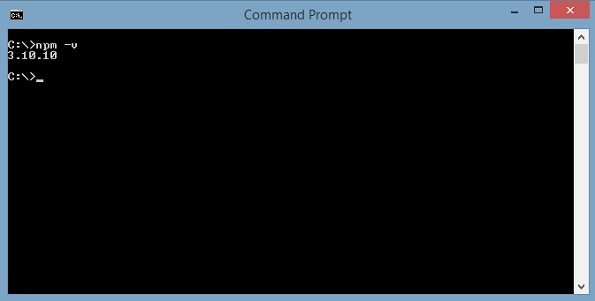
To check the version of npm, type command npm –v in the terminal. It will display the version of npm as shown below.
npm-v-3.10.10The version of npm is 3.10.10. Now that we have nodejs and npm installed, let us run the angular cli commands to install Angular 4. You will see the following commands on the webpage −
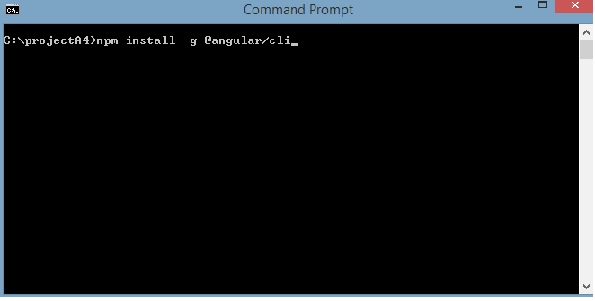
npm install -g @angular/cli //command to install angular 4

ng new Angular 4-app // name of the project

cd my-dream-app

ng serve
Let us start with the first command in the command line and see how it works.
To start with, we will create an empty directory wherein, we will run the Angular CLI command.
Angular CLI Installation Step1Enter the above command to install Angular 4. The installation process will start and will take a few minutes to complete.
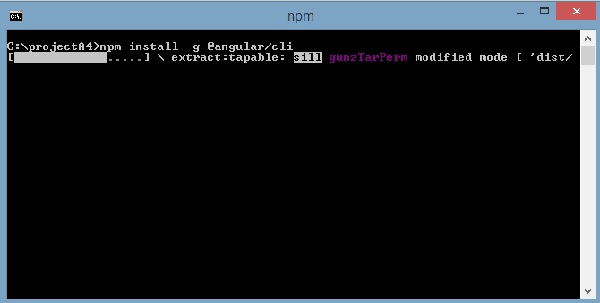
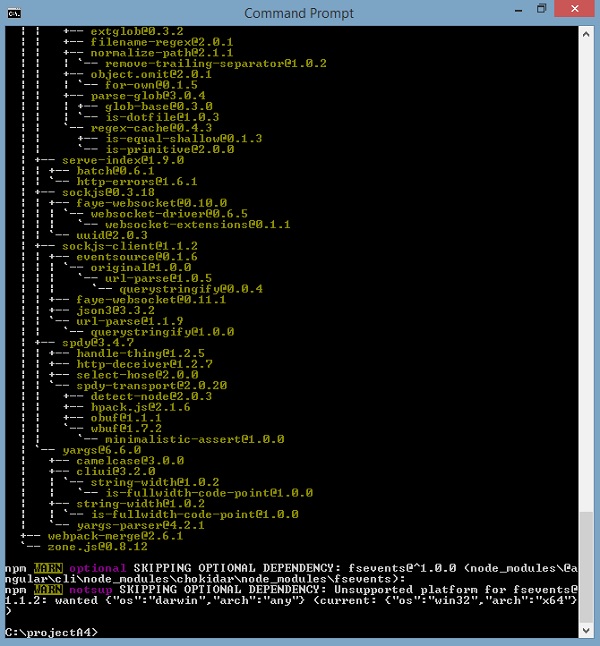
Angular CLI Installation Step2Once the above command to install is complete, the following Command Prompt appears −
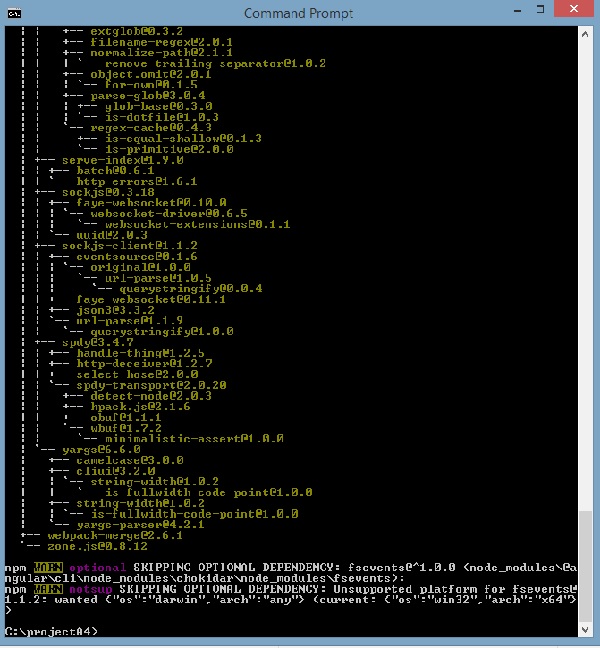
Angular CLI Installation Step3We have created an empty folder ProjectA4 and installed the Angular CLI command. We have also used -g to install Angular CLI globally. Now, you can create your Angular 4 project in any directory or folder and you don’t have to install Angular CLI project wise, as it is installed on your system globally and you can make use of it from any directory.
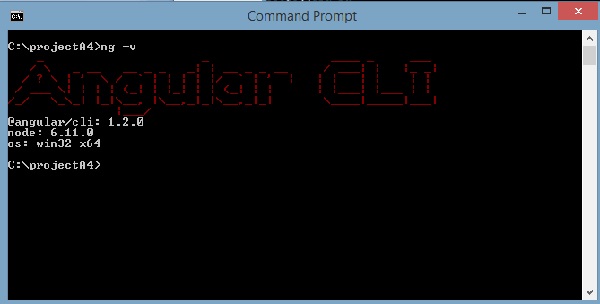
Let us now check whether Angular CLI is installed or not. To check the installation, run the following command in the terminal −
ng -v
Angular CLI Installation Step4We get the @angular/cli version, which is at present 1.2.0. The node version running is 6.11.0 and also the OS details. The above details tell us that we have installed angular cli successfully and now we are ready to commence with our project.
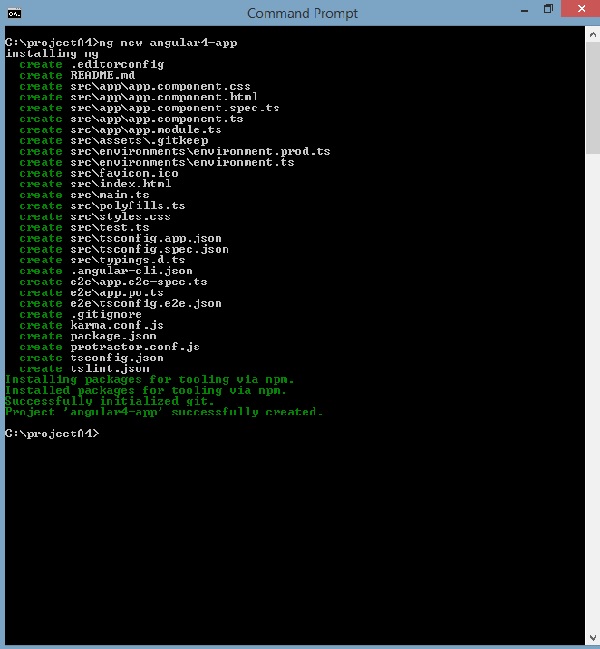
We have now installed Angular 4. Let us now create our first project in Angular 4. To create a project in Angular 4, we will use the following command −
ng new projectname
We will name the project ng new Angular 4-app.
Let us now run the above command in the command line.
Angular CLI Installation Step5The project Angular 4-app is created successfully. It installs all the required packages necessary for our project to run in Angular 4. Let us now switch to the project created, which is in the directory Angular 4-app. Change the directory in the command line - cd Angular 4-app.
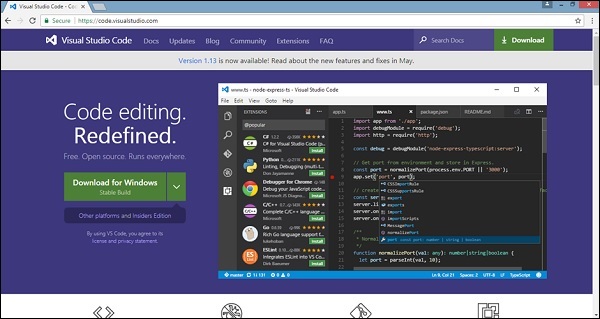
We will use Visual Studio Code IDE for working with Angular 4; you can use any IDE, i.e., Atom, WebStorm, etc.
To download Visual Studio Code, go to https://code.visualstudio.com/ and click Download for Windows.
Visual Studio CodeClick Download for Windows for installing the IDE and run the setup to start using IDE.
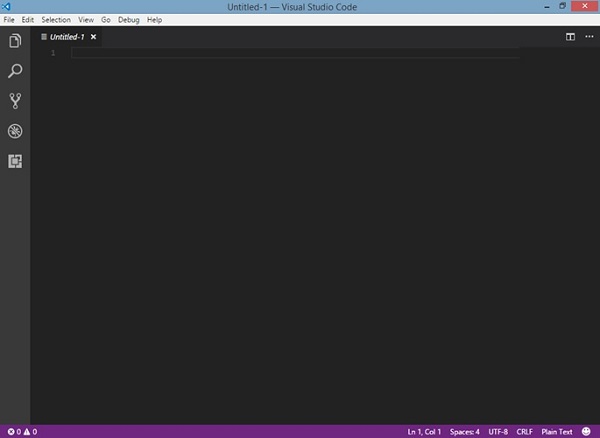
The Editor looks as follows −
Angular CLI EditorWe have not started any project in it. Let us now take the project we have created using angular-cli.
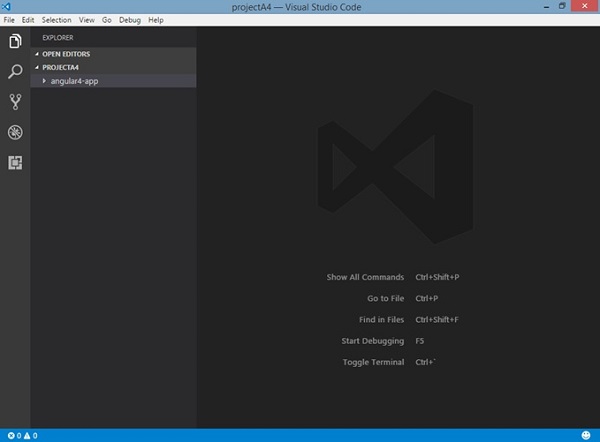
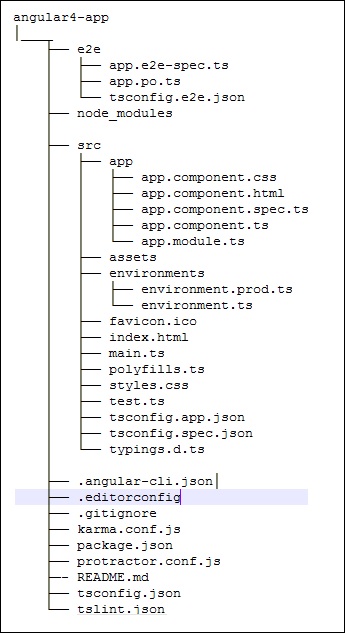
Angular 4-app ProjectWe will consider the Angular 4-app project. Let us open the Angular 4-app and see how the folder structure looks like.
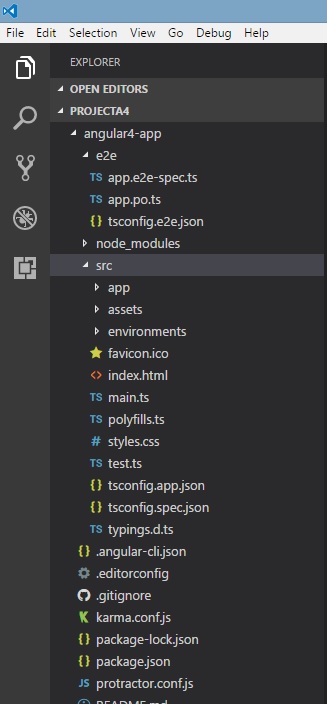
Folder StructureNow that we have the file structure for our project, let us compile our project with the following command −
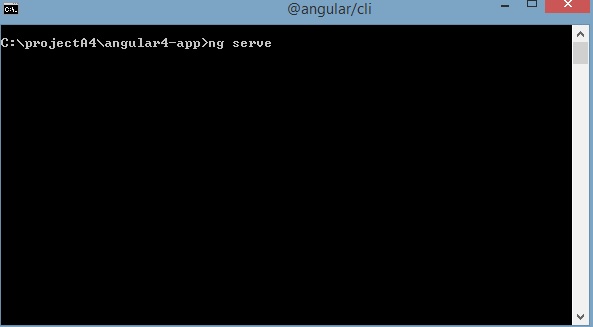
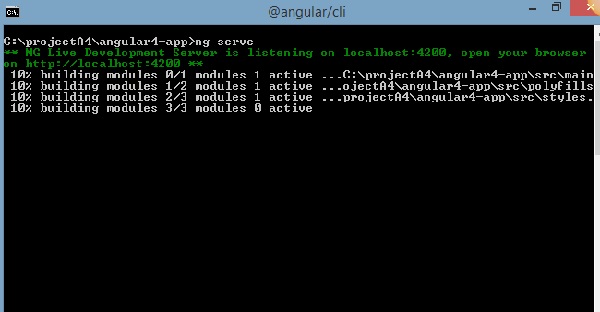
ng serve
The ng serve command builds the application and starts the web server.
ng serve Command ng serve Command Starts ServerThe web server starts on port 4200. Type the url http://localhost:4200/ in the browser and see the output. Once the project is compiled, you will receive the following output −
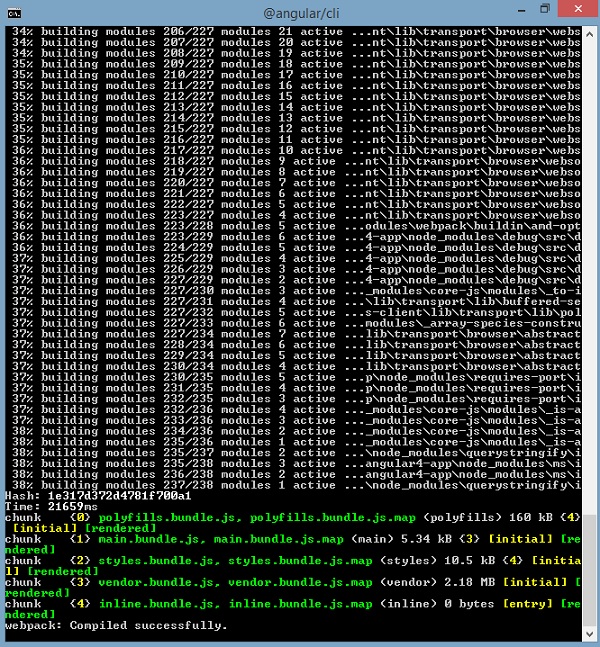
Server Starts On Port 4200Once you run http://localhost:4200/ in the browser, you will be directed to the following screen −
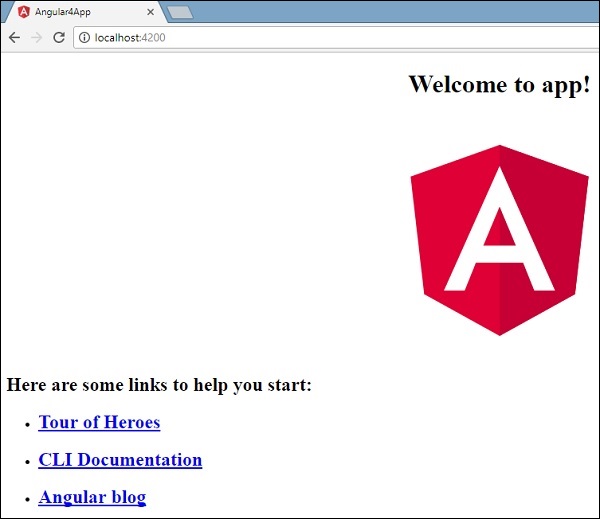
Angular AppLet us now make some changes to display the following content −

“Welcome to Angular 4 project”
Angular 4 ProjectWe have made changes in the files – app.component.html and app.component.ts. We will discuss more about this in our subsequent chapters.
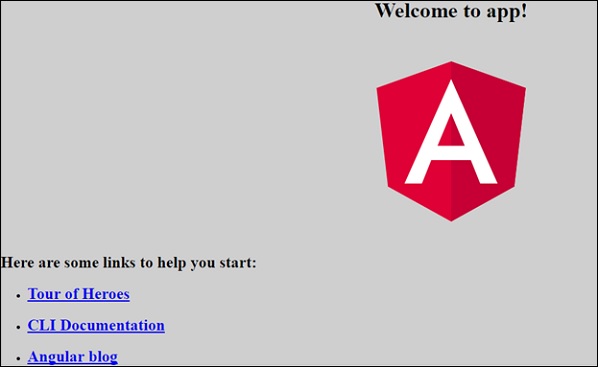
Let us complete the project setup. If you see we have used port 4200, which is the default port that angular–cli makes use of while compiling. You can change the port if you wish using the following command −
ng serve --host 0.0.0.0 –port 4205
The Angular 4 app folder has the following folder structure
  • e2e − end to end test folder. Mainly e2e is used for integration testing and helps ensure the application works fine.
  • node_modules − The npm package installed is node_modules. You can open the folder and see the packages available.
  • src − This folder is where we will work on the project using Angular 4.
The Angular 4 app folder has the following file structure
  • .angular-cli.json − It basically holds the project name, version of cli, etc.
  • .editorconfig − This is the config file for the editor.
  • .gitignore − A .gitignore file should be committed into the repository, in order to share the ignore rules with any other users that clone the repository.
  • karma.conf.js − This is used for unit testing via the protractor. All the information required for the project is provided in karma.conf.js file.
  • package.json − The package.json file tells which libraries will be installed into node_modules when you run npm install.
At present, if you open the file in the editor, you will get the following modules added in it.
"@angular/animations": "^4.0.0",
"@angular/common": "^4.0.0",
"@angular/compiler": "^4.0.0",
"@angular/core": "^4.0.0",
"@angular/forms": "^4.0.0",
"@angular/http": "^4.0.0",
"@angular/platform-browser": "^4.0.0",
"@angular/platform-browser-dynamic": "^4.0.0",
"@angular/router": "^4.0.0",
In case you need to add more libraries, you can add those over here and run the npm install command.
  • protractor.conf.js − This is the testing configuration required for the application.
  • tsconfig.json − This basically contains the compiler options required during compilation.
  • tslint.json − This is the config file with rules to be considered while compiling.
The src folder is the main folder, which internally has a different file structure.

app

It contains the files described below. These files are installed by angular-cli by default.
  • app.module.ts − If you open the file, you will see that the code has reference to different libraries, which are imported. Angular-cli has used these default libraries for the import – angular/core, platform-browser. The names itself explain the usage of the libraries.
They are imported and saved into variables such as declarations, imports, providers, and bootstrap.
import { BrowserModule } from '@angular/platform-browser';
import { NgModule } from '@angular/core';
import { AppComponent } from './app.component';

@NgModule({
declarations
: [
AppComponent
],
imports
: [
BrowserModule
],
providers
: [],
bootstrap
: [AppComponent]
})

export class AppModule { }
declarations − In declarations, the reference to the components is stored. The Appcomponent is the default component that is created whenever a new project is initiated. We will learn about creating new components in a different section.
imports − This will have the modules imported as shown above. At present, BrowserModule is part of the imports which is imported from @angular/platform-browser.
providers − This will have reference to the services created. The service will be discussed in a subsequent chapter.
bootstrap − This has reference to the default component created, i.e., AppComponent.
  • app.component.css − You can write your css structure over here. Right now, we have added the background color to the div as shown below.
.divdetails{
background-color: #ccc;
}
  • app.component.html − The html code will be available in this file.
<!--The content below is only a placeholder and can be replaced.-->
<div class = "divdetails">
<div style = "text-align:center">
<h1>
Welcome to {{title}}!
</h1>
<img width = "300" src = "data:image/svg+xml;base64,PD94bWwgdmVyc2lvbj0iMS4wIiBlbmNv
ZGluZz0idXRmLTgiPz4NCjwhLS0gR2VuZXJhdG9yOiBBZG9iZSBJbGx1c3RyYXRvciAxOS4xLjAsIFNWRyBFe
HBvcnQgUGx1Zy1JbiAuIFNWRyBWZXJzaW9uOiA2LjAwIEJ1aWxkIDApICAtLT4NCjxzdmcgdmVyc2lvbj0iMS4
xIiBpZD0iTGF5ZXJfMSIgeG1sbnM9Imh0dHA6Ly93d3cudzMub3JnLzIwMDAvc3ZnIiB4bWxuczp4bGluaz0iaH
R0cDovL3d3dy53My5vcmcvMTk5OS94bGluayIgeD0iMHB4IiB5PSIwcHgiDQoJIHZpZXdCb3g9IjAgMCAyNTAg
MjUwIiBzdHlsZT0iZW5hYmxlLWJhY2tncm91bmQ6bmV3IDAgMCAyNTAgMjUwOyIgeG1sOnNwYWNlPSJwcmVzZXJ2
ZSI+DQo8c3R5bGUgdHlwZT0idGV4dC9jc3MiPg0KCS5zdDB7ZmlsbDojREQwMDMxO30NCgkuc3Qxe2ZpbGw6I0M
zMDAyRjt9DQoJLnN0MntmaWxsOiNGRkZGRkY7fQ0KPC9zdHlsZT4NCjxnPg0KCTxwb2x5Z29uIGNsYXNzPSJzdD
AiIHBvaW50cz0iMTI1LDMwIDEyNSwzMCAxMjUsMzAgMzEuOSw2My4yIDQ2LjEsMTg2LjMgMTI1LDIzMCAxMjUsMj
MwIDEyNSwyMzAgMjAzLjksMTg2LjMgMjE4LjEsNjMuMiAJIi8+DQoJPHBvbHlnb24gY2xhc3M9InN0MSIgcG9pbn
RzPSIxMjUsMzAgMTI1LDUyLjIgMTI1LDUyLjEgMTI1LDE1My40IDEyNSwxNTMuNCAxMjUsMjMwIDEyNSwyMzAgMj
AzLjksMTg2LjMgMjE4LjEsNjMuMiAxMjUsMzAgCSIvPg0KCTxwYXRoIGNsYXNzPSJzdDIiIGQ9Ik0xMjUsNTIuMU
w2Ni44LDE4Mi42aDBoMjEuN2gwbDExLjctMjkuMmg0OS40bDExLjcsMjkuMmgwaDIxLjdoMEwxMjUsNTIuMUwxMj
UsNTIuMUwxMjUsNTIuMUwxMjUsNTIuMQ0KCQlMMTI1LDUyLjF6IE0xNDIsMTM1LjRIMTA4bDE3LTQwLjlMMTQyLD
EzNS40eiIvPg0KPC9nPg0KPC9zdmc+DQo="
>
</div>
<h2>Here are some links to help you start: </h2>
<ul>
<li>
<h2>
<a target = "_blank" href="https://angular.io/tutorial">Tour of Heroes</a>
</h2>
</li>
<li>
<h2>
<a target = "_blank" href = "https://github.com/angular/angular-cli/wiki">
CLI Documentation
</a>
</h2>
</li>
<li>
<h2>
<a target="_blank" href="http://angularjs.blogspot.ca/">Angular blog</a>
</h2>
</li>
</ul>
</div>
This is the default html code currently available with the project creation.
  • app.component.spec.ts − These are automatically generated files which contain unit tests for source component.
  • app.component.ts − The class for the component is defined over here. You can do the processing of the html structure in the .ts file. The processing will include activities such as connecting to the database, interacting with other components, routing, services, etc.
The structure of the file is as follows −
import { Component } from '@angular/core';

@Component({
selector: 'app-root',
templateUrl: './app.component.html',
styleUrls: ['./app.component.css']
})
export class AppComponent {
title = 'app';
}

Assets

You can save your images, js files in this folder.

Environment

This folder has the details for the production or the dev environment. The folder contains two files.
  • environment.prod.ts
  • environment.ts
Both the files have details of whether the final file should be compiled in the production environment or the dev environment.
The additional file structure of Angular 4 app folder includes the following −

favicon.ico

This is a file that is usually found in the root directory of a website.

index.html

This is the file which is displayed in the browser.
<!doctype html>
<html lang = "en">
<head>
<meta charset = "utf-8">
<title>HTTP Search Param</title>
<base href = "/">
<link href = "https://fonts.googleapis.com/icon?family=Material+Icons" rel="stylesheet">
<link href = "https://fonts.googleapis.com/css?family=Roboto|Roboto+Mono" rel="stylesheet">
<link href = "styles.c7c7b8bf22964ff954d3.bundle.css" rel="stylesheet">
<meta name = "viewport" content="width=device-width, initial-scale=1">
<link rel = "icon" type="image/x-icon" href="favicon.ico">
</head>

<body>
<app-root></app-root>
</body>
</html>
The body has <app-root></app-root>. This is the selector which is used in app.component.ts file and will display the details from app.component.html file.

main.ts

main.ts is the file from where we start our project development. It starts with importing the basic module which we need. Right now if you see angular/core, angular/platform-browser-dynamic, app.module and environment is imported by default during angular-cli installation and project setup.
import { enableProdMode } from '@angular/core';
import { platformBrowserDynamic } from '@angular/platform-browser-dynamic';

import { AppModule } from './app/app.module';
import { environment } from './environments/environment';

if (environment.production) {
enableProdMode();
}
platformBrowserDynamic().bootstrapModule(AppModule);
The platformBrowserDynamic().bootstrapModule(AppModule) has the parent module reference AppModule. Hence, when it executes in the browser, the file that is called is index.html. Index.html internally refers to main.ts which calls the parent module, i.e., AppModule when the following code executes −
platformBrowserDynamic().bootstrapModule(AppModule);
When AppModule is called, it calls app.module.ts which further calls the AppComponent based on the boostrap as follows −
bootstrap: [AppComponent]
In app.component.ts, there is a selector: app-root which is used in the index.html file. This will display the contents present in app.component.html.
The following will be displayed in the browser −
App Module

polyfill.ts

This is mainly used for backward compatibility.

styles.css

This is the style file required for the project.

test.ts

Here, the unit test cases for testing the project will be handled.

tsconfig.app.json

This is used during compilation, it has the config details that need to be used to run the application.

tsconfig.spec.json

This helps maintain the details for testing.

typings.d.ts

It is used to manage the TypeScript definition.
The final file structure looks as follows −
Final File Structure


Angular 4 - Environment Setup

Angular 4 - Environment Setup


To install Angular 4, we require the following −

  • Nodejs
  • Npm
  • Angular CLI
  • IDE for writing your code
Nodejs has to be greater than 4 and npm has to be greater than 3.

Nodejs

To check if nodejs is installed on your system, type node –v in the terminal. This will help you see the version of nodejs currently installed on your system.
C:\>node –v
v6.11.0
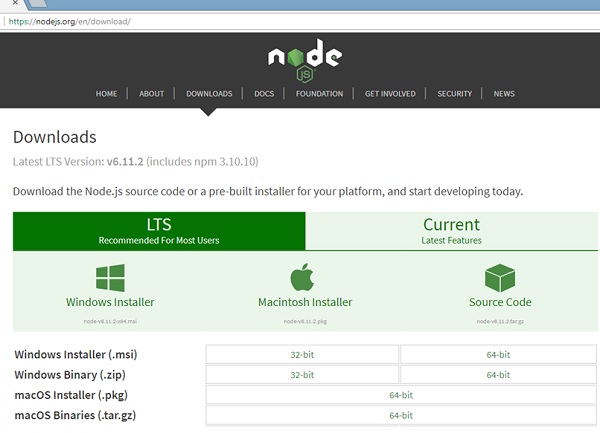
If it does not print anything, install nodejs on your system. To install nodejs, go the homepage https://nodejs.org/en/download/ of nodejs and install the package based on your OS.
The homepage of nodejs will look like the following −
NodeJS HomepageBased on your OS, install the required package. Once nodejs is installed, npm will also get installed along with it. To check if npm is installed or not, type npm –v in the terminal. It should display the version of the npm.
C:\>npm –v
5.3.0
Angular 4 installations are very simple with the help of angular CLI. Visit the homepage https://cli.angular.io/ of angular to get the reference of the command.
Angular CLIType npm install –g @angular/cli, to install angular cli on your system.
Install Angular CLIYou will get the above installation in your terminal, once Angular CLI is installed. You can use any IDE of your choice, i.e., WebStorm, Atom, Visual Studio Code, etc.
The details of the project setup is explained in the next chapter.


Angular 4 - Overview

Angular 4 - Overview

There are three major releases of Angular. The first version that was released is Angular1, which is also called AngularJS. Angular1 was followed by Angular2, which came in with a lot of changes when compared to Angular1.
The structure of Angular is based on the components/services architecture. AngularJS was based on the model view controller. Angular 4 released in March 2017 proves to be a major breakthrough and is the latest release from the Angular team after Angular2.
Angular 4 is almost the same as Angular 2. It has a backward compatibility with Angular 2. Projects developed in Angular 2 will work without any issues with Angular 4.
Let us now see the new features and the changes made in Angular 4.

Why Angular4 and Not Angular3?

The Angular team faced some versioning issues internally with their modules and due to the conflict they had to move on and release the next version of Angular – the Angular4.
Let us now see the new features added to Angular 4 −

ngIf

Angular2 supported only the if condition. However, Angular 4 supports the if else condition as well. Let us see how it works using the ng-template.
<span *ngIf="isavailable; else condition1">Condition is valid.</span>
<ng-template #condition1>Condition is invalid</ng-template>

as keyword in for loop

With the help of as keyword you can store the value as shown below −
<div *ngFor="let i of months | slice:0:5 as total">
Months: {{i}} Total: {{total.length}}
</div>
The variable total stores the output of the slice using the as keyword.

Animation Package

Animation in Angular 4 is available as a separate package and needs to be imported from @angular/animations. In Angular2, it was available with @angular/core. It is still kept the same for its backward compatibility aspect.

Template

Angular 4 uses <ng-template> as the tag instead of <template>; the latter was used in Angular2. The reason Angular 4 changed <template> to <ng-template> is because of the name conflict of the <template> tag with the html <template> standard tag. It will deprecate completely going ahead. This is one of the major changes in Angular 4.

TypeScript 2.2

Angular 4 is updated to a recent version of TypeScript, which is 2.2. This helps improve the speed and gives better type checking in the project.

Pipe Title Case

Angular 4 has added a new pipe title case, which changes the first letter of each word into uppercase.
<div>
<h2>{{ 'Angular 4 titlecase' | titlecase }}</h2>
</div>
The above line of code generates the following output – Angular 4 Titlecase.

Http Search Parameters

Search parameters to the http get api is simplified. We do not need to call URLSearchParams for the same as was being done in Angular2.

Smaller and Faster Apps

Angular 4 applications are smaller and faster when compared to Angular2. It uses the TypeScript version 2.2, the latest version which makes the final compilation small in size.


lEARNING: SQL | WHERE Clause

SQL | WHERE Clause WHERE keyword is used for fetching filtered data in a result set. It is used to fetch data accord...